

How to Apply Invisi Tape Extensions for a Seamless Finish
Last Updated: October 25, 2026
Quick Summary
To apply invisi tape extensions, section dry hair horizontally, peel the backing from each panel, slide it under the section with the tape facing up, then press a matching panel on top tape to tape. Work row by row, moving down and back, and always place panels on bone-dry hair.
- Keep the first panel at least two fingers' width back from the hairline.
- Wash hair the day before application, not the morning of.
- Take sections no wider than the tape panel itself.
- Press tape onto bone-dry hair only, or the bond will slip within days.
- Wash with sulphate-free shampoo two to three times a week.
Table of Contents
- What You Need Before You Start Applying Invisi Tape Extensions
- A Tape Extension Placement Guide for a Natural Hairline
- How to Section Hair for Tape Extensions Cleanly
- Step-by-Step: Applying Invisi Tape Extensions Panel by Panel
- Tape Extensions Aftercare That Protects the Bond
- How to Remove Tape-In Hair Extensions Without Damage
- Book Your Invisi Tape Fitting with Queen of Good Hair
- Frequently Asked Questions
What You Need Before You Start Applying Invisi Tape Extensions
A clean, seamless finish starts before a single panel touches your hair. Invisi tape extensions are pre-taped wefts that bond to your natural hair with a thin, flexible adhesive strip, and the result depends as much on preparation as technique.
Here is what to gather first:
- A clarifying shampoo to strip oils and product build-up
- A tail comb for clean, straight sections
- Sectioning clips to hold hair out of the way
- A fine-tooth comb for smoothing each section flat
- A heat tool on low to warm the tape adhesive if your panels need it
- Clean, dry hands with no oil or hand cream
Wash hair the day before, not the morning of. Natural oils return slightly overnight, which helps the tape grip without slipping. The NHS guidance on caring for your hair is a sensible starting point for scalp health, especially if you have a sensitive scalp or thinning areas.
Browse the Invisible Tapes range to see the shades and panel options before you begin.
A Tape Extension Placement Guide for a Natural Hairline
Placement decides whether extensions look invisible or obvious. Keep the first panel at least two fingers' width back from the hairline, and never bond tape directly against the face-framing hair. That gap is what lets your own hair fall over the top and hide the bond.
Work in a horseshoe shape, following the curve of the head. Each row should sit slightly lower and further back than the one above. For fine or thinning hair, use fewer, thinner panels and space them wider apart to avoid bulk.
A common mistake is placing panels too high and too close together. That is what creates the tell-tale lump at the crown.
For blending tips, read How to Blend Extensions with Hair: A Natural Guide.
How to Section Hair for Tape Extensions Cleanly
Clean sections are the difference between a flat bond and a bulky one. Part dry hair horizontally, from ear to ear, using the tail comb. Clip everything above the parting out of the way.
Take sections no wider than the tape panel itself. Too wide and the panel buckles; too narrow and it slips. Comb each section completely flat against the scalp before you place anything.
- Part horizontally, not diagonally
- Keep sections the same width as your panel
- Comb flat and check for bumps
- Clip loose hair firmly away
Sloppy sectioning is the most common reason a set feels lumpy within a week.
Step-by-Step: Applying Invisi Tape Extensions Panel by Panel
Application is faster than most people expect. Here is the method we recommend, panel by panel:
- Prep the section. Comb it flat and make sure it is completely dry.
- Peel the backing. Remove the protective strip from the tape panel.
- Place underneath. Slide the panel under the section, tape facing up, close to the root but not touching the scalp.
- Press firmly. Hold for a few seconds with clean, flat fingers.
- Sandwich the hair. Place a matching panel on top, tape to tape, and press the two together.
- Repeat row by row. Move down and back with each new row.
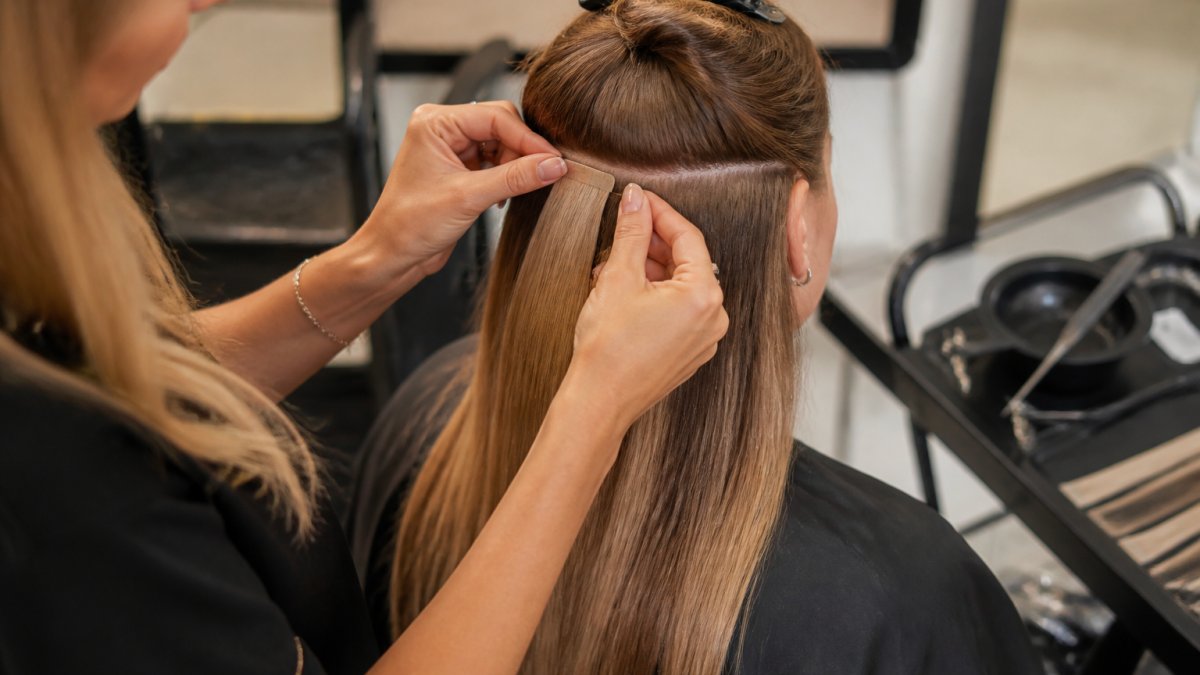
The panels we use in our INVISI TAPE - 50g range are cuticle-intact single-donor hair, which keeps the bond flat and the finish undetectable, even in a high ponytail. For a deeper professional walkthrough, see How to Install Hair Extensions Like a Pro.

Watch out: pressing tape onto damp hair is the fastest way to a bond that slips within days. Always work on bone-dry sections.
Here is the application method broken down panel by panel.
| Step | What to do |
|---|---|
| 1 | Comb the section flat and make sure it is completely dry |
| 2 | Remove the protective strip from the tape panel |
| 3 | Slide the panel under the section, tape facing up |
| 4 | Press firmly with clean, flat fingers for a few seconds |
| 5 | Place a matching panel on top, tape to tape, and press |
| 6 | Repeat row by row, moving down and back |
Tape Extensions Aftercare That Protects the Bond
Aftercare is where most sets are won or lost. The adhesive weakens with oil, heat and rough handling, so treat the bond gently and it will hold far longer.
- Brush before washing, never while wet
- Wash with sulphate-free shampoo, focusing on the scalp
- Keep conditioner off the tape itself
- Dry the bonds thoroughly after washing
- Sleep with hair loosely tied or in a plait
- Avoid oil-based products near the roots
A common mistake is over-washing. Two to three washes a week is plenty for most people. For general hair and scalp care advice, the NHS hair care guidance covers the basics well.
How to Remove Tape-In Hair Extensions Without Damage
Removal should never involve pulling. Use a proper adhesive remover designed for tape extensions, applied sparingly along the bond. Let it soften the tape for a minute or two, then ease the panels apart slowly, working from the ends toward the root.
Never rip a panel free. That is how natural hair gets pulled out at the root, and it can leave thin patches that take months to recover.
- Apply remover along the bond
- Wait for the tape to loosen
- Ease apart gently, section by section
- Wash hair thoroughly afterwards to remove residue
If you are unsure, book a professional removal. It protects both your natural hair and the panels, which can be cleaned and reused.
Book Your Invisi Tape Fitting with Queen of Good Hair
Applying invisi tape extensions well takes practice, and a professional fitting removes the guesswork entirely. Our panels are 100% single-donor virgin hair with aligned cuticles, reusable across multiple applications and built to last. If you would like a fitting or advice on the right shade and panel count, get in touch with our team and we will help you plan your set.
Frequently Asked Questions
Can you apply Invisi Tape extensions at home?
You can, but the result depends on clean sectioning and accurate placement. Work on dry, product-free hair, parting horizontal sections no wider than the tape panel, and keep each panel at least a finger's width below the previous row. If your hair is fine or thinning on top, a professional fitting is safer because a misplaced panel shows through the hairline. QUEEN OF GOOD HAIR's INVISI TAPE - 50g packs are reusable for up to 8-12 applications, so a salon fitting is worth the investment if you plan to reapply regularly.
How should you section hair for tape extensions?
Part the hair horizontally across the back of the head, starting at the nape and working upwards. Each section should be roughly the width of the tape panel and no deeper than 2-3cm, so the natural hair sits over the bond. Clip the rest of the hair out of the way before you begin. Keep sections straight rather than curved, and check each row is level before you press the tape down.
How do you stop tape extensions from showing through fine hair?
Place panels lower than you would on thicker hair, at least 3-4cm back from the hairline, and keep the top row below the crown so natural hair falls over it. Use smaller, lighter panels rather than wide ones, and match the shade closely to your root colour. Blending the top layer with a soft point-cut also hides the tape edge.
How long do tape extensions last and how do you remove them safely?
With proper tape extensions aftercare, a set typically needs refitting every 6-8 weeks as the natural hair grows out, while the hair itself can last 12-24 months with reuse. To remove, apply a professional tape remover or warm oil along the bond, wait for the adhesive to soften, then peel slowly from the bottom edge while holding the root. Never pull dry tape away from the hair, as this can tear strands. Comb through gently afterwards and wash out any residue before refitting.
Getting a seamless finish is less about speed and more about preparation, clean sections and gentle aftercare. If you would rather leave it to trained hands, QUEEN OF GOOD HAIR can guide you from shade selection to a finished fitting. Our single-donor, cuticle-intact hair is designed to sit flat and blend naturally, with a lifespan of 12 to 24 months and no silicone coating. Get started with QUEEN OF GOOD HAIR and book a fitting that gives you a finish you can wear with confidence.
