

How to Install Hair Extensions Like a Pro
Table of Contents
- What You'll Need Before Starting
- Understanding Extension Types and Installation Methods
- Best Tools for Hair Extension Application
- Step-by-Step Installation Process
- How to Blend Hair Extensions with Natural Hair
- Tape In Extensions Side Effects on Natural Hair and Prevention
- Common Mistakes to Avoid
- Frequently Asked Questions
Last Updated: September 25, 2026
To install hair extensions like a pro requires proper technique and knowledge. At QUEEN OF GOOD HAIR, we've identified the key steps that separate professional results from disappointing ones. This guide covers everything you need to achieve seamless, natural-looking results that last.
Professional installation depends on preparation, tool quality, and choosing the right method for your hair type. With patience, precision, and quality products, installing hair extensions like a pro is entirely achievable.
What You'll Need Before Starting
Gather essential tools before starting: sectioning clips to keep hair organised, a fine-tooth comb for detangling, a spray bottle for moisture control, and strong hair clips to hold sections in place.
You'll also need a heat wand for keratin bonds, professional-grade scissors for blending, and a measuring tape to ensure correct spacing from the scalp.
Quality matters: QUEEN OF GOOD HAIR's single-donor virgin hair with aligned cuticles resists tangling and maintains appearance longer. Cheap mixed-donor hair becomes unmanageable within weeks.
Add sectioning spray or mousse for grip on smooth hair, and set up a well-lit mirror to see your work clearly.
Understanding Extension Types and Installation Methods
Different extension types require different techniques. Choosing the wrong method for your hair type leads to damage or poor results, so understand your options before beginning.
Keratin Bond Extensions
Keratin bond extensions use heat-activated adhesive to fuse strands to natural hair, creating a seamless, undetectable bond ideal for styles worn up or away from the face.
The application process involves using a heat wand to melt the keratin bond, then pressing it firmly against a small section of your natural hair. Keratin bonds are among the longest-lasting extension methods available. QUEEN OF GOOD HAIR's keratin bond extensions are designed with 100% single-donor virgin hair, meaning the cuticles remain aligned and the hair resists tangling even after months of wear.
The drawback: keratin bonds require precision; incorrect positioning or uneven heat causes slippage or poor blending.
Nano Ring Extensions
Nano rings are the smallest bond method, virtually invisible at the root. Tiny metal rings clamp around natural hair, securing extensions without heat or glue.
Perfect for fine to medium hair, nano rings create minimal bulk. Application: thread natural hair through the ring, insert extension hair, then tighten with pliers. No heat or adhesive means less stress on natural hair.
QUEEN OF GOOD HAIR's nano ring extensions use the same premium single-donor virgin hair, ensuring that even with this delicate application method, your extensions blend seamlessly and maintain quality throughout their lifespan.
Limitation: nano rings require tightening every 4-6 weeks as hair grows.
Tape-In Extensions
Tape-in extensions use double-sided adhesive to sandwich natural hair between two extension pieces. Fast (under an hour) and creates a flat, undetectable bond.
Tape-ins sit flush against the scalp, ideal for high ponytails or exposed roots. Application: isolate a thin section, apply the extension above it, then press firmly to seal.
QUEEN OF GOOD HAIR's tape-in extensions feature reusable adhesive strips that can be reapplied up to 8-12 times, making them a cost-effective option for long-term wear. The tape-in method works well on all hair types.
Flat Weft Extensions
Flat weft extensions use a thin weft that sits closer to the scalp, reducing bulk and creating a natural appearance for fine or thin hair.
Application uses small metal rings or clips to secure the weft.
QUEEN OF GOOD HAIR's flat weft extensions are designed to move exactly like your own hair, giving you the volume and length you want without the obvious weight or texture change that can occur with bulkier extension methods.
Best Tools for Hair Extension Application
Professional results depend heavily on using quality tools. A heat wand designed specifically for keratin bonds heats to the correct temperature without damaging the adhesive or your natural hair.
Sectioning clips should be smooth and sturdy enough to hold thick sections without slipping. A fine-tooth comb with closely spaced teeth detangles extensions without pulling out individual strands.
Measuring tools matter when you install hair extensions, as proper spacing is essential to installing hair extensions correctly. A measuring tape or ruler helps you space extensions evenly, ensuring a balanced, natural appearance.
A professional mirror setup with bright, natural lighting reveals imperfections in your work that poor lighting would hide.
Step-by-Step Installation Process
Step 1: Prepare and Section Your Hair
Start by washing and drying your hair completely. Damp hair makes it difficult to see what you're doing and can affect how the extensions bond.
Divide your hair into sections using clips. For keratin bonds, create sections approximately 2.5 cm wide and 2.5 cm deep from the scalp. For tape-in extensions, sections should be slightly wider. Use your sectioning clips to keep unsectioned hair out of the way.
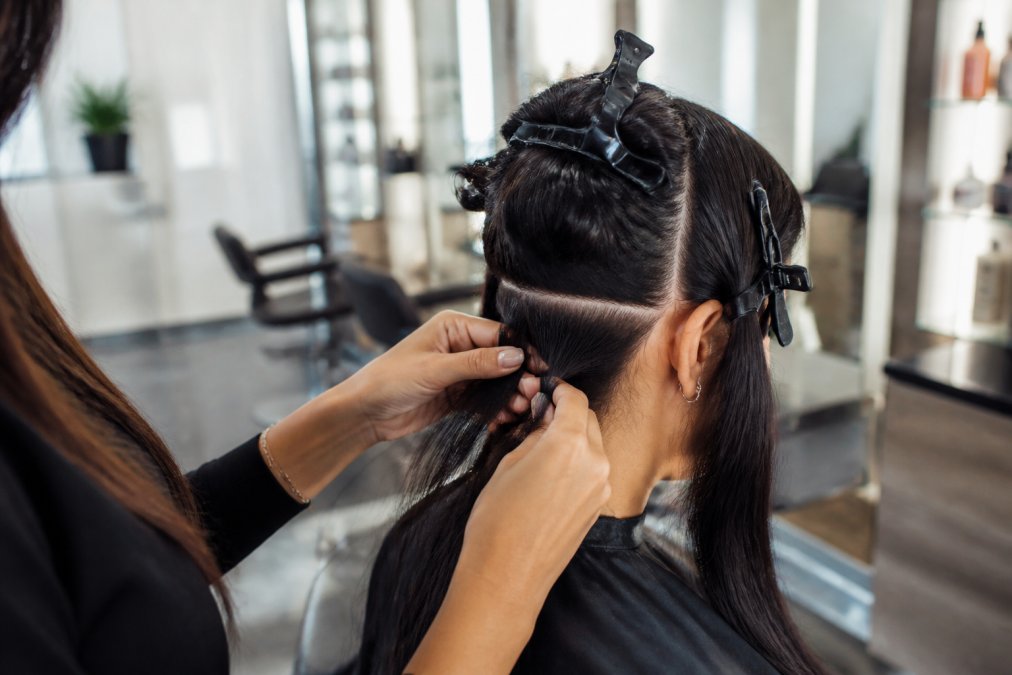
Brush each section thoroughly to remove all tangles. Any knots or tangles left in your hair will prevent the extension from bonding properly.
Step 2: Apply Extensions Using Your Chosen Method
For keratin bonds, take a small section of your natural hair and comb it smooth. Hold the keratin extension between your thumb and forefinger, positioning it approximately 2.5 cm from the scalp. Use your heat wand to warm the keratin bond for 5-10 seconds until it becomes slightly sticky, then press it firmly against your natural hair section.

For nano rings, thread a small section of natural hair through the ring, then insert the extension hair into the ring alongside it. Using ring pliers, tighten the ring firmly but not so tight that you crush the hair. The ring should be snug enough that the extension doesn't slip.
For tape-in extensions, isolate a thin section of natural hair and position the tape-in extension directly above it. Then flip the section over and apply the top piece of the tape-in, sandwiching your natural hair between the two extension pieces.
For flat weft extensions, use small metal rings or clips to secure the weft to sections of your natural hair, following the same spacing guidelines as other methods. Ensure the weft sits flat and parallel to your scalp.
Step 3: Blend and Style
Once all extensions are applied, your work isn't finished. Blending is what separates a professional installation from an obvious one.
Cut and shape the extensions to match your natural hair length and texture. Blunt lines where the extensions meet your natural hair are immediately noticeable.
Style your hair as you normally would; curling, straightening, or waving the extensions along with your natural hair helps them blend visually.
How to Blend Hair Extensions with Natural Hair
Blending hair extensions with natural hair is where many DIY attempts fail. The extensions look obviously fake because they don't integrate smoothly with your existing hair.
Match the texture of your extensions to your natural hair as closely as possible. QUEEN OF GOOD HAIR's single-donor virgin hair comes in a range of textures and can be styled to match your natural curl pattern or texture, making blending significantly easier.
Colour matching is equally important. Even a slight shade difference becomes obvious under certain lighting.
Layering is one of the most effective blending techniques. Rather than creating a blunt line where extensions meet your natural hair, cut some of your natural hair shorter and some longer, creating a graduated effect.
Tape In Extensions Side Effects on Natural Hair and Prevention
Tape-in extensions can cause tension alopecia or hair breakage if applied incorrectly or left in too long without maintenance. Preventing this requires proper application, regular maintenance, and timely removal.

Apply tape-in extensions no closer than approximately 2.5 cm from the scalp. When you remove tape-in extensions, use a proper adhesive remover rather than pulling them out.
Reposition tape-in extensions every 6-8 weeks as your natural hair grows.
Avoid wearing tape-in extensions continuously for more than 3-4 months without taking a break.
Common Mistakes to Avoid
The most common mistake is applying extensions too close to the scalp. Always maintain at least approximately 2.5 cm of space between your scalp and the extension bond.
Skipping the preparation step leads to disappointing results.
Using poor-quality extensions is a false economy. Cheap extensions tangle within weeks, mat easily, and look obviously fake. QUEEN OF GOOD HAIR's premium virgin hair with aligned cuticles resists these problems, maintaining a natural appearance and feel throughout its lifespan.
Neglecting maintenance is another common error. Extensions require regular care, gentle brushing, proper washing with extension-safe products, and periodic repositioning.
Over-styling extensions without proper heat protection damages them. Always use a heat protectant spray before blow-drying, curling, or straightening extensions.
Installing hair extensions like a pro is achievable with the right knowledge, tools, and products. The key is understanding your chosen installation method, preparing your hair properly, and investing in quality extensions that will actually last. QUEEN OF GOOD HAIR's ethically sourced, single-donor virgin hair is designed specifically to resist tangling and maintain its appearance for 12-24 months, giving you the professional results you're aiming for without the disappointment of extensions that degrade after a few weeks. Shop all our extension options and start your transformation today.
Frequently Asked Questions
What is the safest method for installing hair extensions?
Nano ring extensions are among the safest methods available because they use zero heat and zero glue, eliminating damage to your natural hair. Tape-in extensions are another low-damage option, though proper application and removal technique is essential. Always choose extensions made from 100% virgin hair with intact cuticles, like our keratin bond or nano ring options, to minimise stress on your natural strands.
Can I install professional-grade extensions myself?
Some extension types are easier to self-apply than others. Tape-in extensions are the most beginner-friendly and can be applied at home with practice. Nano rings and keratin bonds require more technical skill and specialised tools, making professional installation recommended for best results. If you're new to extensions, starting with tape-in or flat weft methods gives you the best chance of success.
How do I prepare my natural hair for extension installation?
Start with clean, dry hair free of product build-up. Section your hair neatly using clips and a fine-tooth comb.
How long do hair extensions typically last before needing replacement?
Premium virgin hair extensions with intact cuticles, like our 100% single-donor hair, last 12-24 months with proper care and maintenance. Keratin bonds typically last 4-5 months between appointments, whilst tape-in extensions can be reused for 8-12 applications before the adhesive needs refreshing.